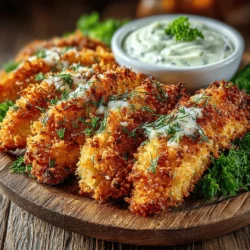
Crispy Baked Chicken Tenders Recipe
Chicken tenders have become a universally adored dish, cherished by children and adults alike. Their appeal lies not only in their tender, juicy meat but also in their versatility. Perfectly suited for a quick weeknight meal, a family gathering, or even a casual snack, chicken tenders can be dressed up or down to suit any occasion. However, traditional fried chicken tenders, while delicious, can be heavy and high in calories. This is where the baked version comes into play, offering a healthier alternative without sacrificing taste or texture.
Baking chicken tenders instead of frying them allows you to enjoy the same crispy exterior and succulent interior, but with far less oil. The beauty of this recipe lies not only in its health benefits but also in its incredible flavor profile. With a simple marination process that infuses the chicken with spices and herbs, combined with a crunchy coating, these baked chicken tenders promise to be a standout dish that will satisfy even the pickiest eaters. Plus, they can be paired with a variety of dipping sauces, making them a perfect appetizer or main course.
Understanding the Ingredients
To create the perfect crispy baked chicken tenders, it’s essential to understand the role of each ingredient involved in the recipe. The foundation of this dish begins with the chicken itself. Chicken tenders, which are the thin strips of meat located beneath the chicken breast, are naturally tender and perfect for quick cooking.
One of the star ingredients for this recipe is buttermilk. Marinating the chicken in buttermilk before baking is crucial, as it not only adds a delightful tanginess but also helps tenderize the meat. The acidity in buttermilk breaks down proteins, resulting in chicken that is not only flavorful but also incredibly moist. For optimal results, marinating the chicken for at least 30 minutes—or even overnight—allows the flavors to truly penetrate the meat.
Next, we have the spices that elevate the chicken tenders from ordinary to extraordinary. A combination of garlic powder, onion powder, paprika, and cayenne pepper works together to create a well-rounded flavor that is both savory and slightly spicy. Garlic powder and onion powder provide a depth of flavor, while paprika adds a touch of sweetness and vibrant color. The cayenne pepper, used sparingly, introduces a gentle kick, which can be adjusted based on personal preference. Fresh or dried herbs, such as thyme or oregano, can also be added for an aromatic dimension.
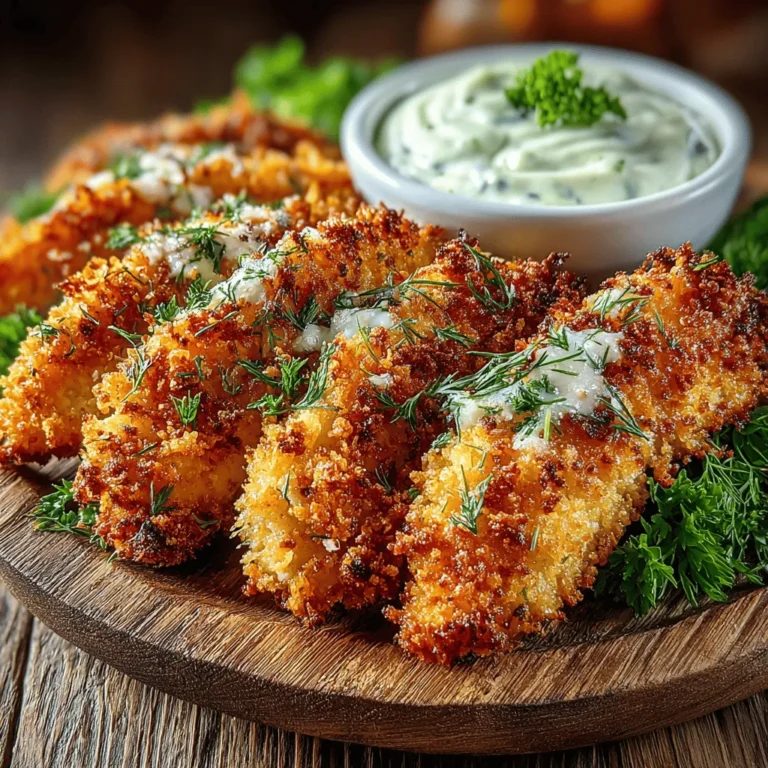
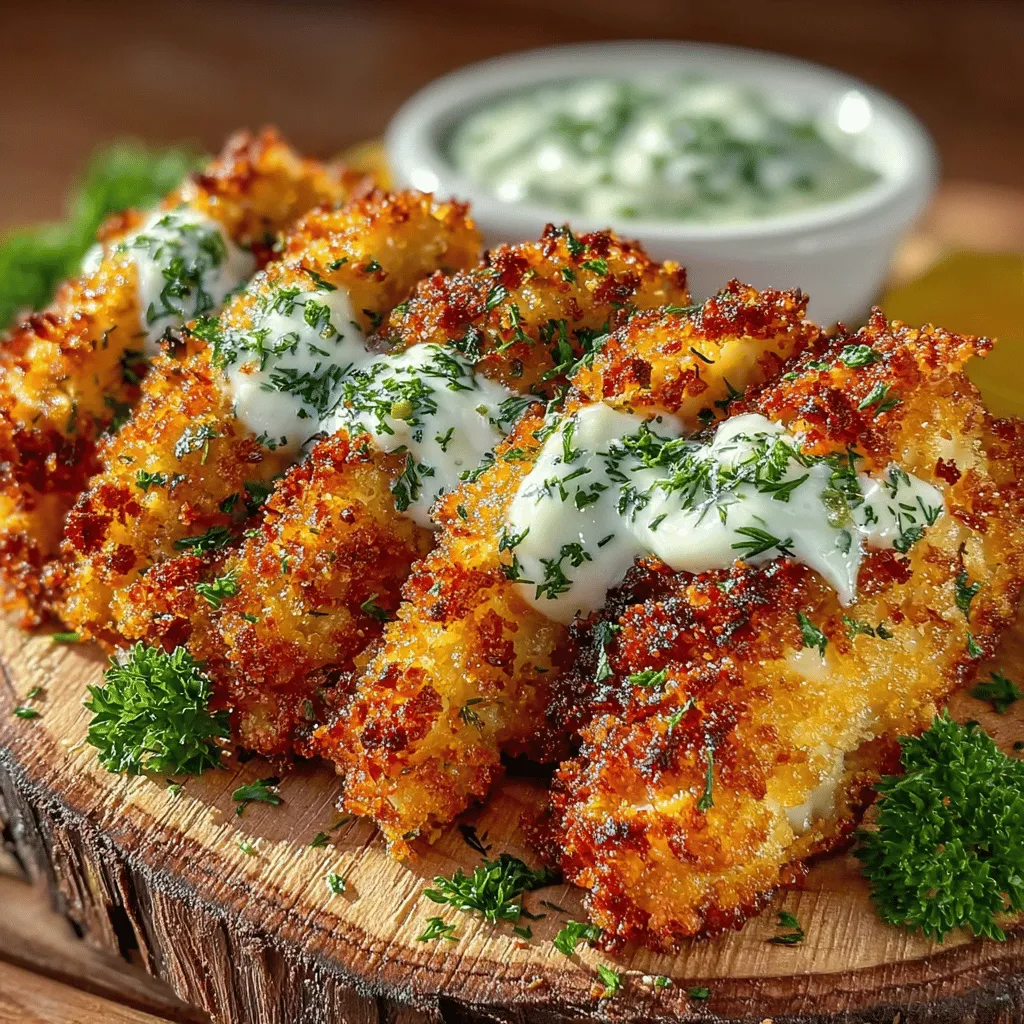
The final component of this recipe is the breading. For a truly crispy texture, panko breadcrumbs are the ideal choice. Unlike traditional breadcrumbs, panko is made from crustless bread and has a light, airy texture that results in an extra crunchy coating when baked. Coating the chicken tenders in panko not only enhances the texture but also provides a visually appealing golden-brown finish.
Preparation Steps
Now that you understand the ingredients, let’s dive into the preparation of your crispy baked chicken tenders. The first step is marinating the chicken. Start by placing the chicken tenders in a large mixing bowl or resealable plastic bag. Pour enough buttermilk over the chicken to cover it completely. Add a generous pinch of salt and the spice mixture, which should include garlic powder, onion powder, paprika, cayenne pepper, and any herbs you choose. Seal the bag or cover the bowl, and refrigerate.
Marination is a critical step in this process. It allows the flavors to meld together and ensures that the chicken stays juicy during the baking process. For best results, aim for at least 30 minutes of marination time, but if you have the luxury of planning ahead, letting the chicken marinate overnight will yield even more pronounced flavors.
While the chicken is marinating, it’s time to set up your breading station. Organizing your workspace will make the preparation process a lot smoother. You will need three shallow dishes: one for all-purpose flour, one for beaten eggs, and the third for panko breadcrumbs mixed with a bit of salt and pepper.
Begin by placing a piece of parchment paper or a baking sheet near your breading station to hold the coated chicken tenders. This will help keep your workspace clean and make cleanup easier afterwards.
Once your chicken has marinated, remove it from the refrigerator. Take each tender and allow any excess buttermilk to drip off before moving it to the flour. Dredge the chicken pieces in the flour, ensuring they are evenly coated. This step is crucial, as the flour creates a base for the egg and panko to adhere to the chicken. After coating in flour, shake off any excess before dipping the tenders into the beaten eggs. The egg acts as a glue, helping the breadcrumbs stick during baking.
Finally, transfer the chicken tenders to the panko breadcrumb mixture. Press the breadcrumbs onto the chicken to ensure an even coating. This not only enhances the texture but also maximizes the crunch. Be sure to shake off any excess breadcrumbs to prevent clumping and ensure a crisp finish.
Once all the chicken tenders are breaded, place them on the prepared baking sheet. For an even crispier result, lightly spray the tops of the tenders with cooking spray or drizzle with a bit of olive oil. This step will help achieve a golden-brown color as they bake.
With your chicken tenders prepped and ready to go, you’re just moments away from enjoying a deliciously crispy and flavorful meal. The next step will involve baking the tenders to perfection, ensuring they are cooked through while maintaining their enticing crunch. Stay tuned for the final baking instructions and tips to achieve the best results!
Preparing Your Oven and Baking Sheet
To achieve perfectly crispy baked chicken tenders, start by preheating your oven to 425°F (220°C). This high temperature is essential for creating that golden, crunchy exterior while keeping the chicken juicy on the inside. While the oven is heating, take the time to prepare your baking sheet. Line it with parchment paper or a silicone baking mat, which will not only prevent sticking but also help with even cooking. To enhance the crispiness, lightly spray the parchment with cooking spray or brush it with a thin layer of olive oil. This small step can make a significant difference in the final texture of your chicken tenders.
Achieving Maximum Crispiness
For those seeking that ultimate crunch, here are a few recommendations:
1. Use Panko Breadcrumbs: Opt for panko breadcrumbs instead of regular breadcrumbs. Panko is lighter and airier, leading to a crispier texture after baking.
2. Double-Dip for Extra Crunch: For an extra layer of crunch, consider double-dipping your chicken tenders. After coating the chicken in flour, dip it in the egg wash, then coat it in panko. Repeat the egg wash and panko process for a thicker crust.
3. Spacing is Key: When placing your chicken tenders on the baking sheet, ensure they are spaced apart. This allows hot air to circulate around each tender, promoting an even and crispy finish.
4. Broil for the Last Few Minutes: If you’re looking for that extra touch of crispiness, consider broiling the chicken tenders for the last 2-3 minutes of cooking. Keep a close eye on them to prevent burning, and remove them once they are golden brown.
Timing and Temperature for Baking
Bake your chicken tenders in the preheated oven for approximately 20-25 minutes. However, cooking times may vary based on the thickness of your chicken. The ideal internal temperature for chicken tenders is 165°F (74°C). To ensure they are cooked through, use a meat thermometer inserted into the thickest part of the tender.
Indicators That the Chicken is Done
Visual cues can also help you determine when your chicken tenders are ready. Look for a golden-brown color on the outside, which indicates that they are nicely cooked. Additionally, the juices should run clear when you cut into them; if they are still pink, return them to the oven for a few more minutes. The chicken should feel firm to the touch, indicating doneness.
Crafting the Perfect Dipping Sauce
A great dipping sauce can elevate your crispy baked chicken tenders to new heights. Here’s how to prepare a creamy and delicious sauce.
Ingredients for the Dipping Sauce
– 1/2 cup Greek yogurt
– 1/4 cup mayonnaise
– 1 tablespoon Dijon mustard
– 1 tablespoon honey
– 1 tablespoon lemon juice
– Salt and pepper to taste
– Optional: chopped fresh herbs (like dill or parsley) for added flavor
Benefits of Greek Yogurt and Mayonnaise
Combining Greek yogurt and mayonnaise creates a perfect balance of creaminess and flavor. Greek yogurt brings a tangy richness and is lower in calories compared to sour cream. Mayonnaise adds a smooth, velvety texture, making the sauce indulgent without the guilt.
Step-by-Step Instructions for Preparing the Dip
1. In a medium bowl, combine the Greek yogurt and mayonnaise.
2. Add in the Dijon mustard, honey, and lemon juice. Mix well until fully combined.
3. Season with salt and pepper to taste. Adjust the sweetness or tanginess by adding more honey or lemon juice according to your preference.
4. If desired, stir in chopped fresh herbs for an extra burst of flavor.
Adjusting Flavors to Personal Preference
Feel free to customize your dipping sauce! If you enjoy a sweeter sauce, increase the honey. For a spicier kick, add a dash of hot sauce or a pinch of cayenne pepper. Experiment with flavors until you find your perfect combination.
Suggestions for Variations or Additional Ingredients
Consider incorporating different ingredients to create a variety of dipping sauces:
– BBQ Sauce: Mix in your favorite BBQ sauce for a smoky flavor.
– Buffalo Sauce: For a spicy twist, add buffalo sauce to the yogurt mixture.
– Herbed Ranch: Blend in ranch seasoning for a classic flavor profile.
Serving Suggestions
Presentation can enhance the dining experience, and your crispy baked chicken tenders deserve to shine on the table.
Presentation Ideas
Serve the chicken tenders on a large platter, garnished with fresh herbs or lemon wedges for a touch of color. Place the dipping sauce in a small bowl in the center or in individual ramekins for convenience.
Pairing Recommendations
To complement your chicken tenders, consider the following side dishes:
– Crispy Sweet Potato Fries: The sweetness of the fries pairs beautifully with the savory tenders.
– Coleslaw: A refreshing coleslaw can add crunch and balance to the meal.
– Fresh Veggies: Serve a platter of carrot and celery sticks for a healthy crunch.
For beverages, consider serving iced tea, lemonade, or a light beer to round out the meal.
Occasions for Serving
Crispy baked chicken tenders are versatile and perfect for various occasions:
– Family Dinners: A comforting option for busy weeknights.
– Parties: Great as finger food that guests can easily enjoy while mingling.
– Game Days: Ideal for serving at gatherings where everyone can snack while cheering on their favorite teams.
Nutritional Information
One of the significant benefits of baked chicken tenders over traditional fried options is their healthier profile. By baking instead of frying, you significantly reduce the amount of oil used, cutting down on unnecessary calories and fat.
Nutritional Benefits of Baked Chicken Tenders
– High in Protein: Chicken is an excellent source of lean protein, essential for muscle building and repair.
– Lower in Fat: Baked tenders retain their flavor while significantly lowering fat intake compared to fried versions.
– Customizable Ingredients: With the option to use whole grain breadcrumbs or substitute Greek yogurt for sour cream, you can tailor the recipe to fit various dietary needs.
Conclusion
In summary, these crispy baked chicken tenders are not only delicious but also easy to prepare, making them a fantastic option for any meal. With their satisfying crunch and juicy interior, they are sure to please both kids and adults alike. This recipe fits seamlessly into a balanced diet while providing a guilt-free way to satisfy those fried chicken cravings.
We encourage you to try making these tenders for your next family gathering or casual dinner. Their versatility in flavor and presentation makes them a hit for any occasion. Dive into the joy of cooking and enjoy the crispy goodness of homemade chicken tenders!