Decadent No-Bake Chocolate Peanut Butter Cups Recipe

WANT TO SAVE THIS RECIPE?

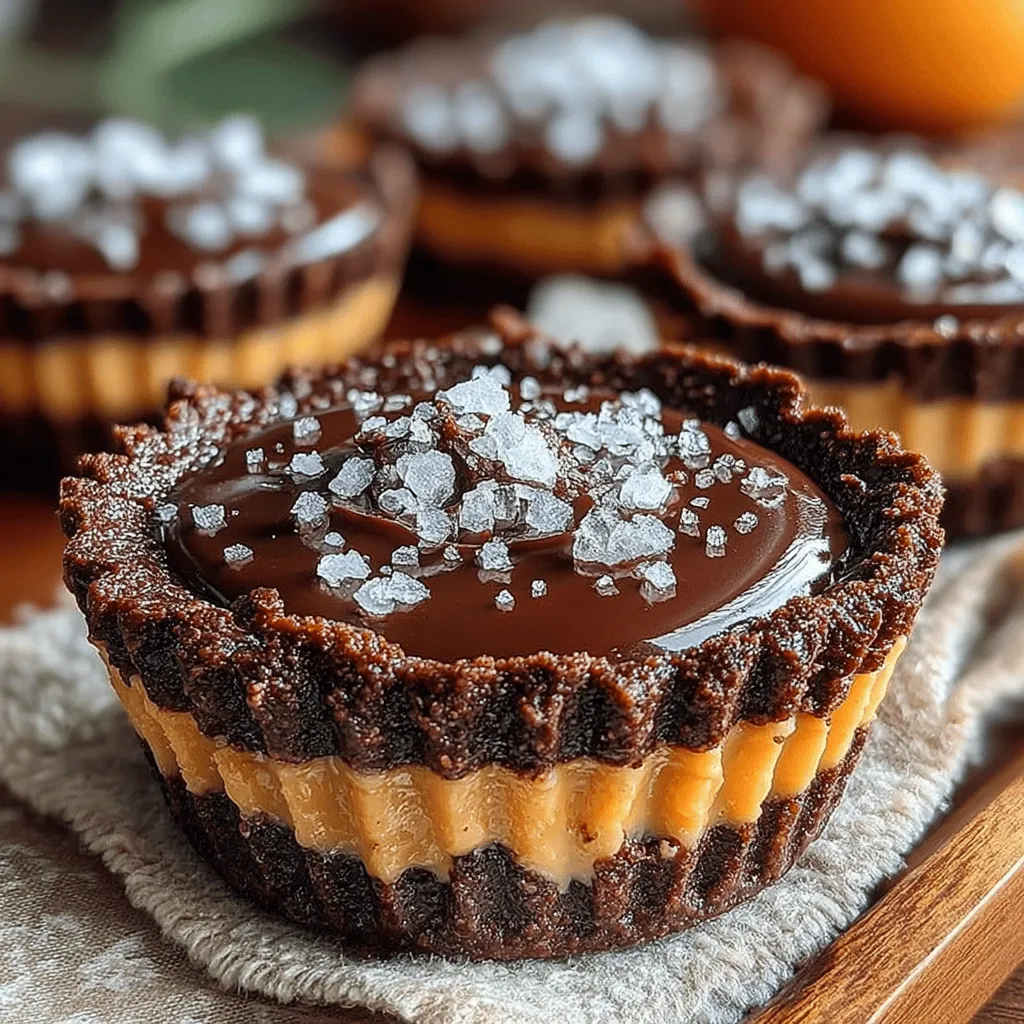
Decadent No-Bake Chocolate Peanut Butter Cups: An Irresistible Treat for All Ages

No-bake desserts have surged in popularity, capturing the hearts of dessert enthusiasts everywhere. These easy-to-make treats provide a perfect solution for those who want to indulge their sweet tooth without the hassle of preheating an oven or dealing with intricate baking techniques. Among the myriad of no-bake options, Decadent No-Bake Chocolate Peanut Butter Cups stand out as a deliciously satisfying choice for both kids and adults. With their rich chocolate exterior and creamy peanut butter filling, these cups are not only delightful to eat but also incredibly simple to prepare, making them an ideal addition to any occasion.

The charm of this recipe lies in its straightforward approach. Even if you’re new to the kitchen, you can whip up these chocolate peanut butter cups in a matter of minutes. For the more experienced bakers, this recipe offers a chance to create a beloved treat without the fuss of conventional baking methods. The result is a delectable dessert that requires minimal ingredients and effort, providing instant gratification for your sweet cravings.

Understanding the Appeal of No-Bake Desserts

The trend of no-bake desserts is gaining momentum in contemporary cooking, and for good reason. These recipes not only save time but also allow home cooks to enjoy delightful treats without the heat of the oven. During warm months or when time is limited, no-bake desserts offer a refreshing alternative to traditional baked goods. The appeal is further heightened by their versatility; no-bake recipes can be adapted to accommodate various flavors, dietary restrictions, and preferences.

One of the standout benefits of no-bake desserts is their ability to simplify the cooking process. With no need for complex techniques like sifting or folding, recipes can be followed with ease, making them accessible to bakers of all skill levels. Additionally, no-bake desserts are often healthier than their baked counterparts, allowing for the substitution of ingredients to create lighter versions without sacrificing flavor. Whether you’re looking to whip up a quick snack for the family or impress guests at a gathering, no-bake treats are a reliable choice.

Ingredients Breakdown

Before diving into the preparation of these Decadent No-Bake Chocolate Peanut Butter Cups, let’s take a closer look at the key ingredients that contribute to their rich flavor and texture:

Creamy Peanut Butter: The star of this recipe, creamy peanut butter brings a luscious texture and nutty flavor. Not only is it delicious, but it also provides a good source of protein, healthy fats, and essential nutrients. Its smooth consistency helps create a rich filling that pairs perfectly with chocolate.

Powdered Sugar: This finely milled sugar plays a crucial role in achieving the perfect sweetness and texture. It dissolves easily, allowing for a smooth and creamy peanut butter filling. The use of powdered sugar helps balance the flavors without the graininess that can come from granulated sugar.

Vanilla Extract: A dash of pure vanilla extract enhances the overall flavor profile, adding depth and aroma to the peanut butter cups. Vanilla is a classic ingredient that complements the nuttiness of peanut butter and the richness of chocolate beautifully.

Graham Cracker Crumbs: These crumbs provide a delightful crunch and structure to the cups. They serve as the base layer, adding a buttery flavor that contrasts well with the soft peanut butter filling. You can easily make your own graham cracker crumbs or purchase them pre-made for convenience.

Dark Chocolate Chips: Opting for dark chocolate chips not only elevates the dessert’s sophistication but also offers health benefits. Dark chocolate is rich in antioxidants and has been linked to various health benefits, including improved heart health. Its bittersweet flavor adds a decadent touch to the overall treat.

Coconut Oil: In this recipe, coconut oil serves as a healthier alternative to traditional butter. It adds a silky texture to the chocolate layer and has its own nutritional benefits, including medium-chain triglycerides that can provide a quick source of energy.

Sea Salt: A pinch of sea salt is vital in bringing out the flavors of the chocolate and peanut butter. It adds a contrasting note that enhances the overall taste experience, making each bite more satisfying.

Preparation Steps Explained

Now that we’ve explored the ingredients, it’s time to get started on the preparation. The first step in making your Decadent No-Bake Chocolate Peanut Butter Cups is to prepare your muffin tin:

1. Preparing the Muffin Tin: Begin by gathering a standard muffin tin and lining each cup with paper liners. This step is essential for easy removal and presentation once the cups are set. The liners will help maintain the shape of the cups and prevent any sticky mess when it comes time to enjoy your creations.

By following these initial steps, you’re setting the stage for a delightful dessert that promises to impress. Stay tuned for the next part of this article, where we will delve into the remaining preparation steps and discover how to transform these ingredients into a mouthwatering treat that everyone will love.

No-bake desserts have surged in popularity, capturing the hearts of dessert enthusiasts everywhere. These easy-to-make treats provide a perfect solution for those who want to indulge their sweet tooth without the hassle of preheating an oven or dealing with intricate baking techniques. Among the myriad of no-bake options, <strong>Decadent No-Bake Chocolate Peanut Butter Cups</strong> stand out as a deliciously satisfying choice for both kids and adults. With their rich chocolate exterior and creamy peanut butter filling, these cups are not only delightful to eat but also incredibly simple to prepare, making them an ideal addition to any occasion.” /></p>
</p>
<h2>Making the Peanut Butter Mixture</h2>
</p>
<p>To create the creamy filling for your chocolate peanut butter cups, start by gathering your ingredients: smooth peanut butter, powdered sugar, and vanilla extract. In a medium-sized mixing bowl, combine 1 cup of smooth peanut butter with 1 cup of powdered sugar. Adding powdered sugar gradually will help control the sweetness and ensure a smooth consistency.</p>
</p>
<h3>Techniques for Achieving the Right Consistency for the Filling</h3>
</p>
<p>The key to a perfect peanut butter filling lies in achieving the right consistency. If your mixture feels too dry, add a teaspoon of milk or a little more peanut butter to loosen it up. Conversely, if it’s too runny, a bit more powdered sugar will help thicken it. The aim is to create a thick, spreadable mixture that holds its shape yet is still creamy enough to enjoy. Once combined, stir in 1 teaspoon of vanilla extract to elevate the flavor profile.</p>
</p>
<h2>Melting the Chocolate</h2>
</p>
<p>Next, it’s time to melt the chocolate, which will serve as the outer layer of our cups. Use about 2 cups of semi-sweet chocolate chips or chopped chocolate. You can melt the chocolate using either the microwave or a double boiler.</p>
</p>
<h3>Tips for Proper Melting to Avoid Burning and Achieve a Smooth Texture</h3>
</p>
<p>If you choose the microwave method, place the chocolate in a microwave-safe bowl and heat it in 30-second intervals at medium power, stirring between each interval. This will help prevent the chocolate from burning. Usually, it will take about 1.5 to 2 minutes to melt completely.</p>
</p>
<p>For the double boiler method, fill a pot with a few inches of water and place a heatproof bowl on top, ensuring it doesn’t touch the water. Heat on low until the chocolate melts, stirring gently. This method provides more control over the heat and helps achieve a silky smooth texture. Once melted, remove it from heat and let it cool slightly before using.</p>
</p>
<h2>Assembling the Cups</h2>
</p>
<p>Now comes the fun part: assembling your chocolate peanut butter cups. Begin by lining a muffin tin with paper liners or silicone molds for easy removal.</p>
</p>
<h3>Step-by-Step Details on Layering for Optimal Flavor and Presentation</h3>
</p>
<p>1. <strong>First Layer</strong>: Spoon a tablespoon of melted chocolate into the bottom of each liner, tilting the tin to ensure the chocolate coats the sides slightly. This creates a sturdy shell for your filling.</p>
<p>2. <strong>Chill</strong>: Place the muffin tin in the refrigerator for about 10-15 minutes until the chocolate has set.</p>
<p>3. <strong>Peanut Butter Filling</strong>: After the chocolate has hardened, take the tin out and add about 1 tablespoon of the peanut butter mixture into each cup, pressing it down gently to ensure it stays in place.</p>
<p>4. <strong>Final Layer</strong>: Top each filled cup with another tablespoon of melted chocolate, ensuring the peanut butter is completely covered.</p>
<p>5. <strong>Set Again</strong>: Return the assembled cups to the refrigerator for an additional 30 minutes to allow the chocolate to set completely.</p>
</p>
<h3>Importance of Allowing Chocolate to Set Properly for Structure</h3>
</p>
<p>Properly setting the chocolate is crucial as it ensures that the cups hold their shape when removed from the molds. This process also enhances the overall texture, providing that satisfying snap when you bite into them.</p>
</p>
<h2>Chilling and Serving</h2>
</p>
<p>The science behind chilling desserts like these chocolate peanut butter cups is essential for achieving the right texture. Chilling not only helps solidify the chocolate but enhances the flavors, as the cold temperature can make the sweetness more pronounced and the peanut butter filling more deliciously creamy.</p>
</p>
<h3>Suggestions for Serving and Enjoying the Cups</h3>
</p>
<p>When you’re ready to serve, gently remove the cups from the muffin tin. If you used paper liners, peel them off carefully. These cups can be enjoyed immediately, or stored in an airtight container in the refrigerator for up to two weeks. For an added touch, drizzle some melted chocolate over the top or sprinkle sea salt for a sweet-salty contrast. These treats are perfect for parties, gatherings, or as a delightful everyday snack.</p>
</p>
<h2>Flavor Variations and Customizations</h2>
</p>
<p>One of the best aspects of this recipe is its versatility. You can easily customize it to suit different preferences or dietary needs.</p>
</p>
<h3>Ideas for Altering the Recipe to Suit Different Preferences</h3>
</p>
<p>– <strong>Alternative Nut Butters</strong>: Swap out peanut butter for almond butter, cashew butter, or even sunflower seed butter for a nut-free version. Each nut butter will provide a unique flavor and texture.</p>
</p>
<p>– <strong>Options for Sweeteners</strong>: For a healthier approach, consider using honey, maple syrup, or coconut sugar instead of powdered sugar. Each alternative will impart its own flavor while reducing the overall sweetness.</p>
</p>
<p>– <strong>Incorporating Additional Ingredients</strong>: Feel free to get creative! Fold in some chopped nuts, dried fruits, or even a sprinkle of cinnamon for added flavor. You can also experiment with flavored extracts like almond or peppermint for a unique spin.</p>
</p>
<h2>Nutritional Information</h2>
</p>
<p>Understanding the nutritional profile of your Decadent No-Bake Chocolate Peanut Butter Cups can help you enjoy them in moderation. Each cup contains a balance of healthy fats from the peanut butter and antioxidants from the chocolate, making them a satisfying treat.</p>
</p>
<h3>Overview of the Nutritional Profile</h3>
</p>
<p>– <strong>Calories</strong>: Approximately 150-200 calories per cup, depending on ingredients.</p>
<p>– <strong>Protein</strong>: Rich in protein from the peanut butter, providing about 4-6 grams per cup.</p>
<p>– <strong>Healthy Fats</strong>: Contains heart-healthy fats, which are beneficial in moderation.</p>
<p>– <strong>Sugar</strong>: The sugar content varies depending on the sweetener used, but it can be adjusted to suit dietary needs.</p>
</p>
<h3>Health Benefits of the Ingredients Used, Emphasizing Moderation and Balance</h3>
</p>
<p>Peanut butter is packed with protein, fiber, and healthy fats, making it a nutritious choice when consumed in moderation. Dark chocolate, particularly, offers antioxidants and may even support heart health. When enjoyed as part of a balanced diet, these cups can be a delightful and satisfying indulgence without compromising overall health.</p>
</p>
<h2>Conclusion</h2>
</p>
<p>Making Decadent No-Bake Chocolate Peanut Butter Cups is not only simple but also incredibly rewarding. The joy of combining rich chocolate with creamy peanut butter creates a delicious treat that appeals to many. With easy steps and a few adjustments, you can customize these cups to suit your taste or dietary preferences.</p>
</p>
<p>We invite you to try this recipe and experience the delightful combination of flavors for yourself. Whether as a special dessert for a gathering or a sweet snack for yourself, these chocolate peanut butter cups are sure to impress. Share the joy with friends and family, and enjoy the smiles that come with these tasty creations.</p>
</div>

No-bake desserts have surged in popularity, capturing the hearts of dessert enthusiasts everywhere. These easy-to-make treats provide a perfect solution for those who want to indulge their sweet tooth without the hassle of preheating an oven or dealing with intricate baking techniques. Among the myriad of no-bake options, Decadent No-Bake Chocolate Peanut Butter Cups stand out as a deliciously satisfying choice for both kids and adults. With their rich chocolate exterior and creamy peanut butter filling, these cups are not only delightful to eat but also incredibly simple to prepare, making them an ideal addition to any occasion.

No-Bake Chocolate Peanut Butter Cups

Discover the joy of making Decadent No-Bake Chocolate Peanut Butter Cups, a treat that's as simple as it is delicious. Perfect for kids and adults alike, these cups feature a rich chocolate shell filled with creamy peanut butter goodness. With easy preparation and minimal ingredients, they offer a quick and satisfying way to indulge your sweet tooth. Ideal for any occasion, these no-bake delights can be tailored to suit various tastes and dietary needs, making them a versatile choice. Get ready to impress with this delightful dessert!

Ingredients
  

1 cup creamy peanut butter (natural or regular)

1/3 cup powdered sugar

1 teaspoon vanilla extract

1 cup graham cracker crumbs

1 1/2 cups dark chocolate chips (or semi-sweet, if preferred)

2 tablespoons coconut oil (or butter)

Sea salt (for garnish, optional)

Instructions
 

Prepare the Muffin Tin: Line a muffin tin with paper liners (regular or mini, based on desired size).

    Make the Peanut Butter Mixture: In a medium bowl, combine the creamy peanut butter, powdered sugar, vanilla extract, and graham cracker crumbs. Mix well until it forms a thick, dough-like consistency.

      Melt the Chocolate: In a microwave-safe bowl, combine the dark chocolate chips and coconut oil. Heat in the microwave in 30-second intervals, stirring in between until completely melted and smooth.

        Assemble the Cups:

          - Spoon a small amount of melted chocolate into the bottom of each muffin liner, about 1 teaspoon.

            - Gently tap the muffin tin on the counter to spread the chocolate evenly.

              - Place the tin in the freezer for about 10 minutes to allow the chocolate to set.

                Add Peanut Butter Filling: Once the bottom layer of chocolate is firm, take the muffin tin out of the freezer. Spoon about 1 tablespoon of the peanut butter mixture on top of the set chocolate layer, smoothing it out gently.

                  Top with Chocolate: Finally, pour another spoonful of melted chocolate over the peanut butter layer, completely covering it. Use a spatula or the back of a spoon to spread it evenly.

                    Chill: Return the muffin tin to the freezer and chill for at least 30 minutes or until the chocolate is fully hardened.

                      Serve and Enjoy: Once set, carefully peel away the paper liners. Sprinkle a pinch of sea salt on top if desired, and serve.

                        Prep Time: 20 minutes | Total Time: 1 hour | Servings: 12 cups

                          WANT TO SAVE THIS RECIPE?

                          Leave a Comment

                          Recipe Rating