
Pumpkin & Spinach Spanakopita Triangles: A Delicious Twist on a Greek Classic
Spanakopita, a beloved dish originating from Greece, has captured the hearts and taste buds of food enthusiasts worldwide. Traditionally made with tender spinach and creamy feta enveloped in crisp layers of phyllo pastry, spanakopita is a staple in Greek cuisine, often served as an appetizer, snack, or even a light meal. Its origins can be traced back to the Byzantine era, where it served not only as a sustenance-rich dish but also as a symbol of the vibrant flavors and culinary traditions of the Mediterranean region. Over the years, many variations of spanakopita have emerged, showcasing different fillings and adaptations that celebrate local ingredients and seasonal produce.
In this recipe, we take a delightful detour from the classic spinach filling by introducing pumpkin, creating a unique and seasonal twist that elevates the flavor profile of the traditional dish. The combination of pumpkin and spinach not only enhances the taste but also adds a beautiful autumnal color to the triangles, making them visually appealing for any gathering or special occasion. Whether you’re looking for a savory appetizer for your next dinner party or a comforting snack to enjoy on a chilly day, these pumpkin and spinach spanakopita triangles are sure to impress.
Understanding Spanakopita
At its core, spanakopita is a savory pie characterized by its flaky phyllo pastry and flavorful filling. The traditional filling is primarily made of fresh spinach, mixed with feta cheese, onions, herbs, and sometimes eggs to bind the mixture together. Each ingredient plays a vital role in crafting the dish’s signature taste, with the creamy tang of feta complementing the earthy notes of spinach. In Greek culture, spanakopita is often associated with family gatherings, celebrations, and festive occasions, symbolizing hospitality and warmth.
The preparation of spanakopita typically involves layering sheets of phyllo pastry, brushing each layer with melted butter or olive oil to achieve that signature crispiness when baked. The filling is then spread evenly over the pastry, and the entire assembly is folded into triangles, ready to be baked to golden perfection. The result is a delightful treat that is both crunchy on the outside and deliciously savory on the inside.
The Benefits of Pumpkin and Spinach
Incorporating pumpkin into the spanakopita filling not only gives it an exciting twist but also adds a host of nutritional benefits. Pumpkin is a nutrient-dense food, rich in vitamins A and C, potassium, and antioxidants. These nutrients contribute to overall health, supporting immune function and skin health while providing a good source of dietary fiber. The natural sweetness of pumpkin also balances the savory flavors of spinach and feta, creating a harmonious blend that tantalizes the palate.
Spinach, on the other hand, is a powerhouse of nutrition, known for its high iron content, vitamins K and A, and a wealth of antioxidants. This leafy green is often touted for its role in promoting healthy blood circulation and bolstering the immune system. By combining pumpkin and spinach in this recipe, you create a wholesome filling that is not only delicious but also packed with nutrients, making these spanakopita triangles a guilt-free indulgence.
Ingredients Breakdown
To create the perfect pumpkin and spinach spanakopita triangles, you’ll need a selection of fresh and flavorful ingredients. Here’s a detailed breakdown of each component:
– Pumpkin Puree: You can use either homemade or canned pumpkin puree for this recipe. Homemade pumpkin puree offers a fresher flavor, allowing you to control the sweetness and texture. To make your own, roast fresh pumpkin until tender, scoop out the flesh, and blend it until smooth. If you’re short on time, canned pumpkin puree is a convenient option; just ensure you choose a variety that contains pure pumpkin without added sugars or spices. The rich, creamy texture of pumpkin puree serves as a perfect base for the filling, adding moisture and depth of flavor.
– Fresh Spinach: Fresh spinach is essential for achieving the right texture and flavor in your spanakopita. While frozen spinach may be a tempting alternative, it often contains excess moisture, which can make the filling soggy. By using fresh spinach, you not only enhance the dish’s nutritional value but also maintain the vibrant green color and crisp texture. To prepare the spinach, wash it thoroughly and sauté until wilted, ensuring to remove any excess water before adding it to the filling mixture.
– Feta Cheese: Feta cheese is a key ingredient in traditional spanakopita, providing a creamy and tangy flavor that perfectly complements the earthiness of spinach and the sweetness of pumpkin. When selecting feta, look for high-quality options, ideally made from sheep’s milk or a blend of sheep and goat’s milk for the best flavor. Crumbled feta can be easily mixed into the filling, giving each bite a burst of deliciousness.
With these ingredients on hand, you’re ready to embark on the journey of crafting your pumpkin and spinach spanakopita triangles. The following steps will guide you through the preparation process, ensuring that you achieve that perfect balance of flavors and textures that make this dish a standout at any gathering. Stay tuned for the detailed instructions on how to assemble and bake these delightful treats!
Spices and Seasonings
In the world of culinary arts, the right spices and seasonings can elevate a dish from ordinary to extraordinary. For our Pumpkin & Spinach Spanakopita Triangles, nutmeg and oregano play pivotal roles in bringing depth and complexity to the flavor profile. Nutmeg, with its warm, sweet aroma, complements the earthiness of pumpkin, adding a subtle hint of warmth that enhances the dish’s overall taste. Meanwhile, oregano contributes a fragrant, slightly peppery note, perfectly balancing the richness of the filling. Together, these spices create a harmonious blend that will leave your taste buds tingling and your guests wanting more.
Preparation Steps for Perfect Spanakopita Triangles
To achieve the perfect Pumpkin & Spinach Spanakopita Triangles, careful preparation is essential. Here’s a detailed guide to ensure your success.
Preheating the Oven
Before diving into the preparation of your spanakopita, preheat your oven to 375°F (190°C). This step is crucial as it ensures that the pastries begin baking at the right temperature, allowing for even cooking and a beautifully golden-brown finish. A properly preheated oven helps achieve that desired crispy texture, making your spanakopita triangles irresistible.
Sautéing the Filling
The filling of your spanakopita is where much of the flavor comes from, so it’s essential to pay attention to this step. Start by heating a tablespoon of olive oil in a large skillet over medium heat. Add finely chopped onions and sauté until they become translucent and slightly caramelized—about 5 to 7 minutes. Next, incorporate minced garlic and continue cooking for an additional minute, stirring frequently to prevent burning. This combination of onions and garlic forms a fragrant base that enhances the overall flavor of your filling.
Once your aromatics are ready, add the spinach and cook until it wilts down, which should take about 2 to 3 minutes. Finally, stir in the cooked pumpkin puree, salt, nutmeg, and oregano. Combine these ingredients thoroughly, allowing the flavors to meld together for another 2 minutes. Remove the mixture from heat and let it cool slightly before proceeding to the next steps.
Combining Ingredients
Once the filling has cooled, it’s time to incorporate the cheese. Crumbled feta cheese adds creaminess and a slightly tangy flavor that beautifully contrasts with the sweetness of the pumpkin. Gently fold the feta into the spinach and pumpkin mixture, ensuring an even distribution without overmixing. This careful folding technique maintains the integrity of the cheese while allowing all the flavors to blend harmoniously.
Preparing Phyllo Pastry
Handling phyllo dough can be intimidating, but with the right techniques, you can achieve stunning results. Begin by thawing your phyllo dough in the refrigerator overnight, or at room temperature for a few hours. Once ready, carefully unroll the sheets and cover them with a damp kitchen towel to prevent drying out.
To prepare the phyllo pastry, take two sheets and brush them lightly with melted butter or olive oil, stacking them on top of each other. This not only adds richness but also helps achieve that flaky texture we all love. Repeat this process for as many triangles as you plan to make. Remember to work quickly to avoid the dough drying out, which can lead to tearing.
Shaping the Triangles
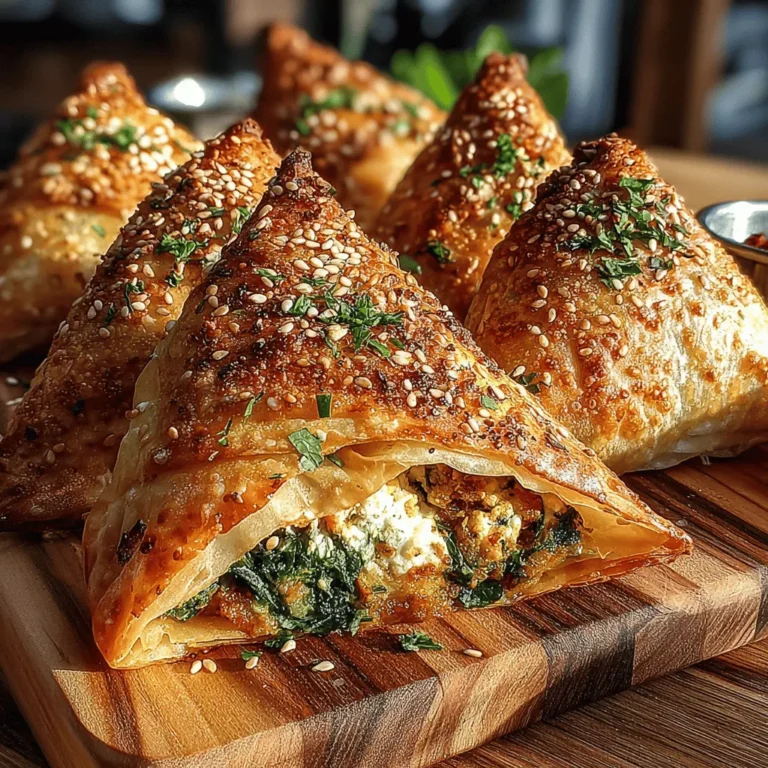
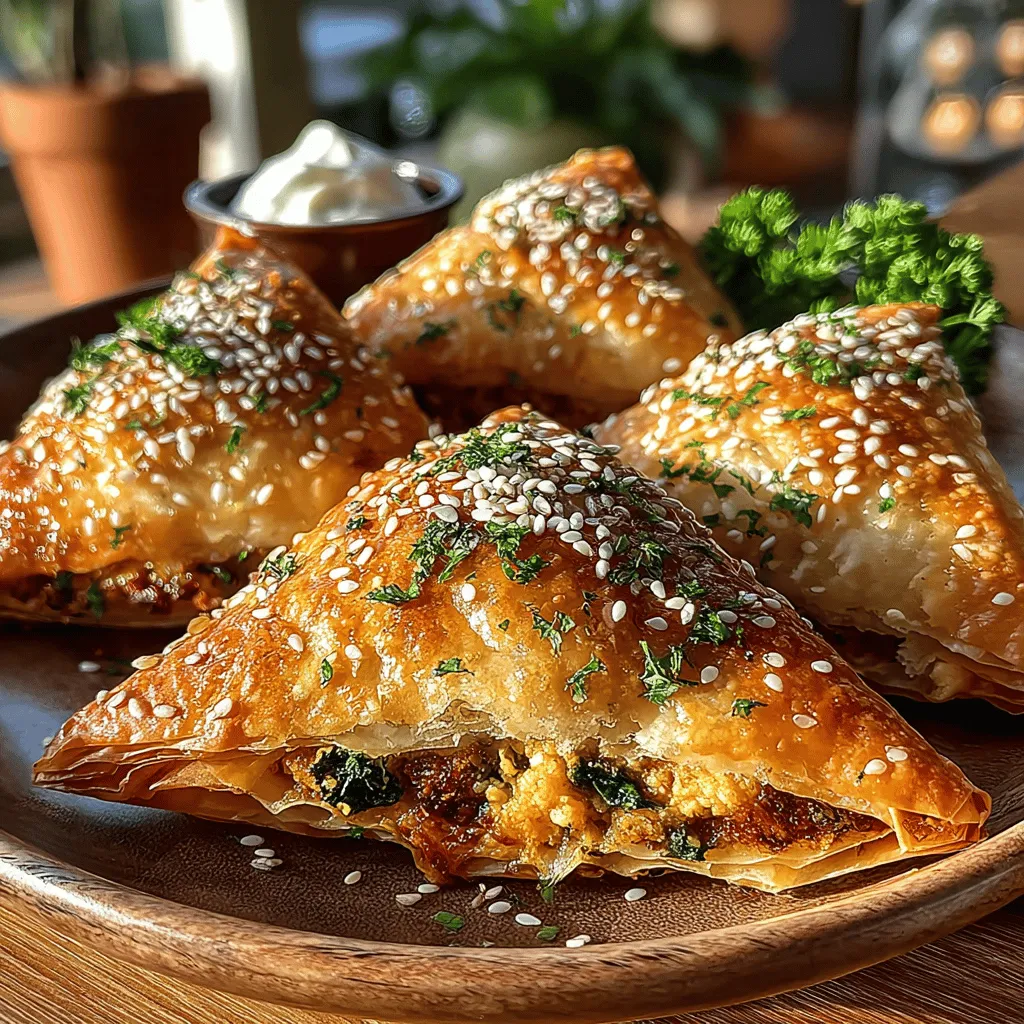
Now comes the fun part! To shape your spanakopita triangles, start by cutting the layered phyllo sheets into strips approximately 3 inches wide. At the end of each strip, place about a tablespoon of the filling. Begin folding the strip over the filling, creating a triangle shape. Continue folding the strip over itself, alternating sides, until you reach the end of the strip. Make sure to seal the triangle by brushing the edges with a bit of melted butter or water. This step ensures that your filling stays intact during baking and gives your pastries a polished look.
Baking and Serving Suggestions
Baking Tips
Once your triangles are formed, place them on a lined baking sheet. Brush the tops with more melted butter to promote browning and enhance flavor. Bake in the preheated oven for about 25 to 30 minutes, or until the triangles are golden brown and crispy. Keep an eye on them during the last few minutes of baking to prevent burning. The aroma that fills your kitchen will be a sure sign that your spanakopita is ready to enjoy!
Serving Ideas
While spanakopita can be enjoyed on its own, pairing them with delightful dips and sides enhances the overall experience. A classic tzatziki sauce, made with yogurt, cucumber, garlic, and dill, provides a refreshing contrast to the warm, savory pastries. Alternatively, a simple side salad with mixed greens, cherry tomatoes, and a light vinaigrette offers a great balance of flavors and textures. Consider serving the spanakopita triangles on a beautiful platter, garnished with fresh herbs, to impress your guests.
Presentation Tips
Presentation is key when serving any dish. Arrange the spanakopita triangles in a circular pattern on a large serving platter or in individual portions on small plates. Add a sprinkle of fresh herbs, such as parsley or dill, for a pop of color. You can also place a small bowl of tzatziki in the center of the platter for an inviting touch. A drizzle of olive oil on top of the triangles just before serving adds an extra layer of flavor and visual appeal.
Storage and Reheating
Best Practices for Storing Leftovers
If you find yourself with leftover spanakopita triangles, don’t worry! They can be stored for later enjoyment. Allow them to cool completely, then transfer them to an airtight container. Line the bottom of the container with parchment paper to prevent sticking. Properly stored, they can last in the refrigerator for up to 3 days. If you want to keep them for a longer period, consider freezing the uncooked triangles. Simply assemble them, place them on a baking sheet, and freeze until solid. Once frozen, transfer them to a freezer-safe bag or container for up to 2 months.
Reheating Tips
When it comes to reheating, you want to ensure that your spanakopita retains its crispiness. Preheat your oven to 350°F (175°C). Place the triangles on a baking sheet and cover them loosely with aluminum foil to prevent over-browning. Heat for about 10 to 15 minutes, or until warmed through. For an extra crispy texture, remove the foil during the last 5 minutes of reheating.
Conclusion
The unique flavor and nutritional benefits of Pumpkin & Spinach Spanakopita Triangles make them an excellent choice for a healthy appetizer or snack. With the earthy sweetness of pumpkin, the vibrant freshness of spinach, and the flaky perfection of phyllo pastry, this dish is not only delicious but also packed with vitamins and minerals.
We encourage you to try this recipe and share it with family and friends, whether at a gathering or as a delightful treat for yourself. Cooking is a joyful experience, and there’s nothing quite like sharing homemade dishes with loved ones. Embrace the art of cooking, and let these spanakopita triangles be a testament to your culinary skills. Enjoy every bite, and relish the smiles they bring to your table!
