
Introduction
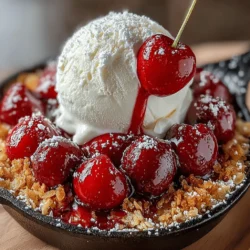
Crispy Cherry Crisp is a dessert that effortlessly combines the sweet and tart notes of cherries with a delectable, crunchy topping. This classic dish offers a delightful contrast in textures, making it a favorite among dessert lovers. The beauty of this recipe lies not only in its taste but also in its versatility; whether you opt for fresh cherries during the peak of summer or frozen cherries when they’re out of season, you can enjoy this sweet treat year-round. Perfect for gatherings, cozy family dinners, or simply indulging in some self-care, Crispy Cherry Crisp is a dessert that never disappoints.
In this article, we will delve into the intricacies of crafting this beloved dessert, providing you with a comprehensive guide that covers everything from the essential ingredients to the step-by-step preparation process. By the end of this guide, you’ll be equipped with all the knowledge you need to create a memorable Cherry Crisp that will impress your family and friends alike.
Understanding the Ingredients
Cherry Filling Essentials
The heart of any great Cherry Crisp is, of course, the cherry filling. Selecting high-quality ingredients is key to achieving a dish that bursts with flavor.
Fresh vs. Frozen Cherries
When it comes to cherries, you have two primary options: fresh and frozen. Fresh cherries are typically preferred for their vibrant flavor and juicy texture, especially during their peak season. They can add a delightful sweetness and a pop of color to your dish. However, if fresh cherries are out of season or unavailable, frozen cherries are an excellent alternative. They are picked at the height of ripeness and flash-frozen, preserving their flavor and nutrients. Both options work beautifully in this recipe, so feel free to choose based on availability and preference.
Sweeteners
Granulated sugar plays a crucial role in balancing the tartness of the cherries. The sweetness helps to mellow out the natural acidity of the fruit, creating a harmonious flavor profile. Depending on your taste, you can adjust the amount of sugar you use, but be cautious not to over-sweeten, as the tartness is a key characteristic of the crisp.
The Importance of Lemon Juice
Lemon juice not only enhances the overall flavor of the cherry filling but also helps preserve the vibrant color of the fruit. The acidity from the lemon juice brightens the dish and adds a refreshing zing that complements the sweetness of the cherries. A splash of lemon juice is essential for achieving that perfect balance.
The Role of Cornstarch
To achieve the ideal consistency in your cherry filling, cornstarch is a must. This thickening agent works by absorbing excess moisture from the cherries as they cook, creating a luscious filling that clings to the fruit. The result is a satisfying texture that enhances the overall experience of the Crisp.
Flavor Enhancers
To elevate the cherry flavor, consider incorporating vanilla and almond extracts into your filling. A splash of vanilla extract adds warmth and depth, while almond extract introduces a subtle nuttiness that beautifully complements the cherries. These flavor enhancers can make a significant difference in the final taste of your dish.
Crispy Topping Components
The topping of your Cherry Crisp is just as important as the filling. A well-crafted topping adds texture and flavor, bringing the whole dessert together.
The Base
Rolled oats and all-purpose flour form the foundation of the crispy topping. The oats provide a hearty texture and chewiness, while the flour helps bind the ingredients together. The combination of these two elements creates a satisfying crunch that contrasts beautifully with the soft cherry filling.
Sweetness and Depth
For the perfect balance of sweetness, a combination of brown sugar and granulated sugar is recommended. Brown sugar adds moisture and a hint of caramel flavor, while granulated sugar contributes a clean sweetness. Together, they create a topping that is both flavorful and satisfying.
Aromatic Cinnamon
Cinnamon is a warm spice that enhances the overall flavor of the crisp. Its aromatic qualities complement the cherries perfectly, adding depth and a comforting warmth. A sprinkle of cinnamon in the topping can elevate the dish to new heights.
The Crunch Factor
Nuts can add an extra layer of texture and richness to your topping. Walnuts, pecans, or almonds are popular choices that pair well with cherries. The added crunch not only enhances the experience but also contributes healthy fats to the dish.
Butter
Butter is the secret ingredient that brings the crispy topping to life. It helps to achieve that golden, crispy texture that we all crave in a fruit crisp. As the butter melts during baking, it binds the ingredients together and creates a beautifully rich flavor that rounds out the topping.
Step-by-Step Preparation Guide
Prepping the Oven and Baking Dish
Before diving into the recipe, it’s essential to prepare your oven and baking dish properly.
Importance of Preheating
Preheating your oven is a crucial step that shouldn’t be overlooked. When your oven is properly preheated, it ensures that your dessert bakes evenly and achieves that perfect golden-brown topping. Aim to preheat your oven to 350°F (175°C) before starting on the filling or topping.
Greasing the Dish
To prevent your Cherry Crisp from sticking to the baking dish, lightly grease it with butter or cooking spray. This simple step can save you from the frustration of having to scrape off bits of your delicious dessert from the bottom of the dish after baking.
Creating the Cherry Filling
With your oven preheated and your baking dish ready, it’s time to prepare the cherry filling.
Detailed Instructions
1. Prepare the Cherries: If using fresh cherries, wash them thoroughly, remove the pits, and slice them in half. For frozen cherries, there is no need to thaw them; simply measure them out as needed.
2. Mix the Filling Ingredients: In a large mixing bowl, combine the prepared cherries with granulated sugar, lemon juice, cornstarch, vanilla extract, and almond extract. Stir gently until the cherries are evenly coated with the mixture. It’s important to ensure that all the cherries are well-enveloped in the sweet, tangy sauce.
3. Visual Cues: As you mix, look for the cherries to start releasing their juices, creating a syrupy consistency. The filling should appear glossy, and the cornstarch should be evenly distributed throughout. This is a sign that your filling is ready to be poured into the prepared baking dish.
By following these steps, you will create a vibrant and flavorful cherry filling that serves as the heart of your Crispy Cherry Crisp. The combination of sweet, tart cherries with the right balance of ingredients sets the stage for a truly delightful dessert experience. Stay tuned for the next part of this article, where we will dive into creating the crispy topping and the final baking process!
Making the Crispy Topping
Creating the perfect crispy topping is essential for your Cherry Crisp, as it provides that delightful crunch that contrasts beautifully with the soft, sweet filling. Here’s how to achieve it:
Mixing Techniques: How to Achieve the Right Crumbly Texture
Start by combining your dry ingredients in a large mixing bowl. You will need rolled oats, flour, brown sugar, and a pinch of salt. Use a whisk to blend these ingredients thoroughly, ensuring that the sugar and salt are evenly distributed throughout the mixture.
Next, add your cold, cubed butter to the dry mixture. The key here is to use cold butter; this will prevent it from melting too quickly and will help create that desired crumbly texture. Using a pastry cutter or your fingers, work the butter into the dry ingredients until the mixture resembles coarse crumbs. Be careful not to overwork the mixture—aim for a texture that still holds some larger clumps; this will contribute to the crispiness when baked.
Incorporating Ingredients: Tips for Evenly Distributing the Melted Butter
In some variations of Cherry Crisp, melted butter is used instead of cold butter. If you choose this method, pour the melted butter over your dry ingredients gradually. Use a fork to gently combine the mixture, ensuring that all the dry ingredients are moistened without forming a dough. This will give your topping a more uniform texture, enhancing the crispness.
Once you’ve achieved the right consistency, set the topping aside while you prepare the fruit filling. Remember, the topping should hold together slightly when squeezed but still break apart easily.
Assembling the Cherry Crisp
With the filling and topping ready, it’s time to bring everything together for baking.
Layering Techniques: Best Practices for Evenly Distributing the Topping Over the Filling
Begin by pouring your cherry filling into a greased baking dish. Spread it out evenly to ensure that every spoonful of the finished dish is filled with fruit. The filling should be slightly heaped, as it will reduce during baking.
Next, take your crispy topping and sprinkle it generously over the cherry filling. Use your fingers to break up any large clumps, but leave some larger pieces intact for added texture. Make sure to cover the filling entirely; any exposed fruit may caramelize too quickly and could lead to a burnt taste.
Importance of Even Spreading: How It Impacts the Final Texture and Cooking
An even spread of the topping is crucial for even cooking. If some areas are heavily packed while others are sparse, the denser areas may not cook through properly, resulting in a soggy texture. Aim for a consistent layer across the top, about half an inch thick. This will ensure that the topping bakes evenly, giving you that perfect crunch you’re after.
Baking to Perfection
Now that your Cherry Crisp is assembled, it’s time to bake!
Baking Time and Temperature: Key Indicators to Know When It’s Ready
Preheat your oven to 350°F (175°C). Place the baking dish in the oven and set a timer for 30-35 minutes. The baking time may vary slightly depending on your oven and the thickness of your layers.
As it bakes, keep an eye on the topping; it should become golden brown and crisp. If you notice that the topping is browning too quickly while the filling is still bubbling, you can cover the dish loosely with aluminum foil to prevent burning while allowing the filling to cook through.
Observing the Crisp: What to Look for in Terms of Bubbling and Browning
A perfectly baked Cherry Crisp will have a bubbly filling that is visible around the edges of the dish. The topping should be golden brown with a crisp texture. If you press down gently on the topping and it feels firm, you’re on the right track.
For best results, let the Cherry Crisp cool for about 10 minutes before serving. This will allow the juices to thicken slightly, making it easier to serve.
Serving Suggestions and Pairings
Cooling and Serving
Best Practices for Cooling: How Long to Let It Sit Before Serving to Achieve the Best Texture
After baking, it’s tempting to dig right in, but patience pays off! Allow your Cherry Crisp to cool for at least 10-15 minutes prior to serving. This cooling period helps set the filling, making it less runny and easier to scoop. If you plan to serve it warm, this is the perfect time to prepare your desired accompaniments.
Serving Temperature: The Debate Between Warm Versus Chilled Serving
Cherry Crisp can be enjoyed warm, at room temperature, or even chilled. While warm is the classic choice, serving it chilled can offer a refreshing twist, especially during warmer months. Consider your guests’ preferences when deciding how to serve it.
Garnishing Ideas
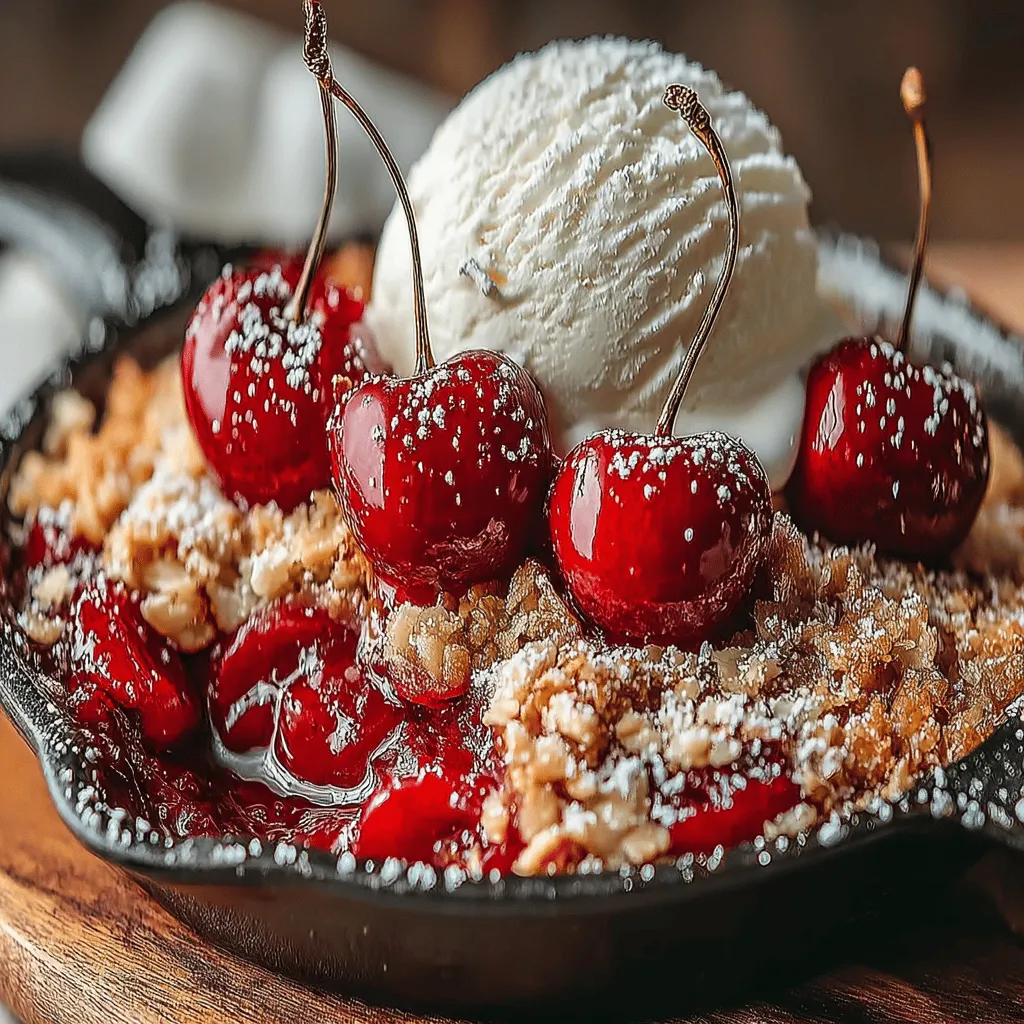
Ice Cream Pairing: Discuss the Classic Vanilla Ice Cream Accompaniment and Other Alternatives
No Cherry Crisp is complete without a scoop of ice cream! Vanilla ice cream is the classic choice, complementing the tart cherries beautifully. The creaminess of the ice cream balances the sweetness of the crisp, creating a delicious contrast.
For a twist, consider pairing it with other flavors like almond, chocolate, or even a dairy-free option if you’re catering to vegan guests.
Whipped Cream: Enhancing the Dessert Experience with a Light Dollop
If ice cream isn’t available, a light dollop of freshly whipped cream can also enhance the experience. The airy texture adds a delightful creaminess and helps to cut through the sweetness of the dish.
Fresh Ingredients: The Option of Garnishing with Mint Leaves or Additional Cherries
For a touch of color and freshness, garnish your Cherry Crisp with a sprig of mint or a few fresh cherries on top. This not only elevates the presentation but adds a burst of flavor that complements the dish.
Nutritional Information
Caloric Breakdown and Health Considerations
A serving of Cherry Crisp typically contains around 300-400 calories, depending on the portion size and specific ingredients used. While it’s undeniably a treat, there are ways to make it a bit healthier without sacrificing flavor.
Potential Substitutions for Dietary Restrictions: Gluten-Free Options and Sugar Alternatives
If you’re looking to accommodate dietary restrictions, consider these substitutions:
– Gluten-Free: Use certified gluten-free oats and flour to make the recipe suitable for those with gluten sensitivities.
– Sugar Alternatives: Swap out brown sugar for coconut sugar or a sugar substitute like stevia or erythritol for a lower-calorie option.
These adjustments can help make your Cherry Crisp a bit lighter while still maintaining its delicious taste.
Conclusion
The Crispy Cherry Crisp is a timeless dessert that combines simple ingredients to create a dish that is both comforting and indulgent. Its balance of sweet and tart flavors, complemented by a crunchy topping, makes it a favorite among dessert lovers. Whether you’re serving it at a family gathering or enjoying a quiet evening at home, this recipe is sure to please.
With the guidance provided, you can confidently create your own Crispy Cherry Crisp and share the joy of this delectable treat with friends and family. Enjoy the delightful flavors and textures, and remember, the best part of making this dish is the joy of sharing it with others!