
Grilled Tomato & Pesto Flatbread Recipe
Introduction
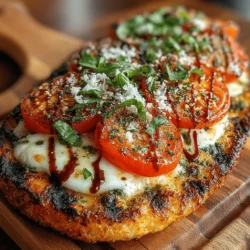
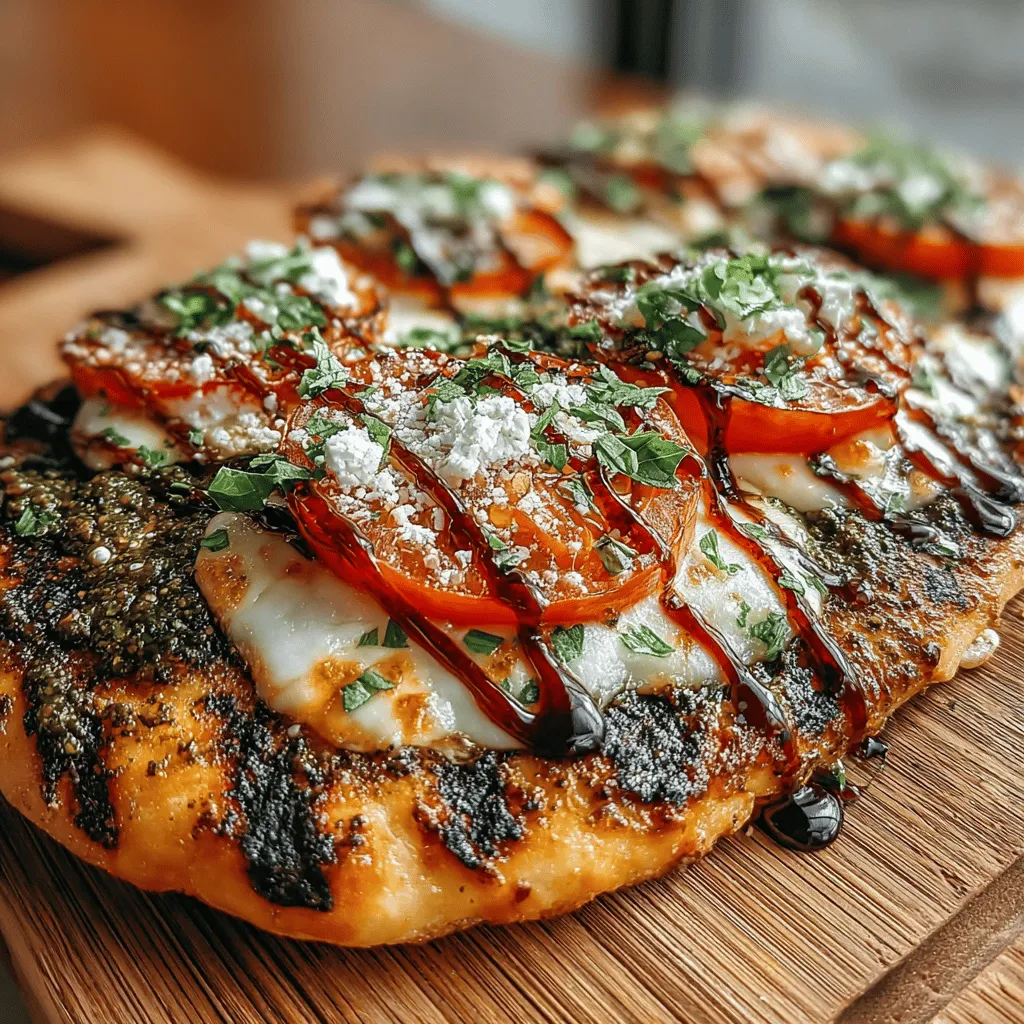
Grilled flatbreads have become a beloved staple in kitchens and at gatherings, celebrated for their versatility and flavor. These delightful creations can serve as appetizers, main dishes, or even as a base for a vibrant summer meal. One standout recipe that encapsulates the essence of grilled flatbreads is the Grilled Tomato & Pesto Flatbread. This dish perfectly marries the freshness of ripe tomatoes with the aromatic richness of basil pesto, creating a taste sensation that is both simple and sophisticated.
Whether you’re hosting a casual barbecue, enjoying a picnic in the park, or looking for a quick yet impressive appetizer, this flatbread is sure to impress. Its simplicity makes it accessible to home cooks of all skill levels, while the combination of fresh ingredients elevates it to a culinary delight. With just a few key components, you can create a dish that is bursting with flavor and color, ideal for summer gatherings or cozy nights at home.
In this article, we’ll explore the main ingredients that make this flatbread shine, along with a step-by-step guide to crafting the perfect Grilled Tomato & Pesto Flatbread. Let’s dive in!
Understanding the Ingredients
To create a mouthwatering Grilled Tomato & Pesto Flatbread, it’s essential to understand the role of each ingredient in the recipe. Each component contributes not only to the flavor but also to the texture and overall experience of the dish.
– All-Purpose Flour: The foundation of your flatbread, all-purpose flour provides the necessary structure. Its gluten content ensures that the flatbread can be stretched and grilled to perfection, yielding a delightful chewiness.
– Active Dry Yeast: This ingredient is crucial for leavening the dough. When activated, active dry yeast ferments and produces carbon dioxide, which creates air pockets in the bread, resulting in a light and airy texture.
– Warm Water: The temperature of your water is vital for yeast activation. Warm water (around 110°F) helps to dissolve the yeast, ensuring it wakes up and begins to work effectively.
– Sugar: A small amount of sugar is added not just for sweetness, but also to feed the yeast during fermentation. This helps the dough rise and develop a slightly golden crust when grilled.
– Olive Oil: This rich ingredient enhances both flavor and texture. It makes the flatbread more pliable and adds a luscious mouthfeel, complementing the other ingredients beautifully.
– Basil Pesto: The heart of this recipe, basil pesto brings a burst of flavor that is both fresh and aromatic. While store-bought pesto is convenient, making your own can elevate the flatbread to another level, allowing for customization and freshness.
– Tomatoes: Selecting the right tomatoes is essential for grilling. Varieties such as Roma or heirloom tomatoes are ideal for their balance of moisture and flavor. When grilled, they caramelize beautifully, enhancing their natural sweetness.
– Fresh Mozzarella Cheese: Utilizing fresh mozzarella is key to achieving that gooey, melty texture that complements the toppings. Its mild flavor allows the other ingredients to shine through without overpowering them.
– Fresh Basil Leaves and Balsamic Glaze: These garnishes not only add visual appeal but also enhance the overall flavor profile. Fresh basil offers a pop of brightness, while a drizzle of balsamic glaze adds a hint of sweetness and acidity, balancing the richness of the cheese.
Step-by-Step Guide to Making Grilled Flatbread
Now that we have a solid understanding of the ingredients, it’s time to get our hands dirty and start making the Grilled Tomato & Pesto Flatbread! This section will cover the initial steps, from preparing the dough to letting it rise.
Making the Flatbread Dough
1. Mixing the Ingredients: Start by combining the all-purpose flour, active dry yeast, sugar, and salt in a large mixing bowl. Create a well in the center and pour in the warm water and olive oil. Using a wooden spoon or your hands, mix until the dough begins to come together.
2. Kneading the Dough: Once the dough has formed, transfer it to a lightly floured surface. Knead the dough for about 8-10 minutes, until it becomes smooth and elastic. The dough should be slightly tacky but not overly sticky. If it’s too sticky, sprinkle in a little more flour, a tablespoon at a time, until the desired consistency is reached. Remember, the texture of the dough is crucial; it should be soft yet hold its shape.
3. Troubleshooting Dough Consistency: If your dough feels too dry, you can add a tiny splash of warm water to bring it back together. Conversely, if it’s too wet, incorporate more flour gradually. The goal is a dough that is pliable and elastic, perfect for stretching and grilling.
Letting the Dough Rise
Once you’ve kneaded the dough to the perfect consistency, it’s time to let it rise. This step is crucial for developing flavor and texture.
1. Optimal Conditions for Rising: Lightly grease a large bowl with olive oil and place your dough inside, turning it to coat it in oil. Cover the bowl with a clean kitchen towel or plastic wrap and place it in a warm, draft-free area. Ideal rising conditions are around 75-80°F.
2. How to Tell When It’s Ready: Allow the dough to rise for about 1 to 1.5 hours, or until it has doubled in size. To check if it’s ready, gently press your finger into the dough; if the indentation remains and doesn’t spring back, it’s ready to be shaped.
Preparing the Grill
With the dough rising, it’s time to prepare the grill for cooking. A properly heated grill is essential for achieving those characteristic grill marks and a perfect crust.
1. Best Practices for Grilling Flatbreads: Preheat your grill to medium-high heat, around 400°F to 450°F. If using a gas grill, ensure that all burners are lit and preheating evenly. For charcoal grills, allow the charcoal to burn until it’s covered with white ash.
2. Grill Preparation: Lightly oil the grill grates using a paper towel dipped in vegetable oil. This prevents the flatbreads from sticking and helps in achieving that perfect crispy exterior.
With your dough ready and the grill primed, you are one step closer to enjoying the deliciousness of Grilled Tomato & Pesto Flatbread. In the next section, we will cover how to shape the dough, add the toppings, and grill to perfection. Stay tuned for the continuation of this flavorful journey!
Shaping the Flatbreads
Creating the perfect flatbread begins with shaping the dough. Here are some techniques to ensure your flatbreads are evenly shaped and ready for the grill.
Techniques for Rolling Out the Dough Evenly
Start by dividing your pizza dough into equal portions, typically about the size of a tennis ball for individual flatbreads. Lightly flour your work surface and rolling pin to prevent sticking. When rolling out the dough, apply even pressure and start from the center, moving outward. This technique will help maintain a uniform thickness throughout the flatbread.
If you prefer a rustic look, you can use your hands to stretch the dough instead of a rolling pin. Gently pull and stretch the dough, rotating it as you go, until it reaches your desired flat shape. This method not only adds character to your flatbreads but also helps to maintain a chewy texture.
Discussing Thickness and Its Impact on Cooking Time and Texture
The thickness of your flatbread plays a crucial role in the final outcome. A thinner flatbread will grill faster and develop a delightful crispiness, while a thicker version will yield a chewier texture. For optimal results, aim for a thickness of about ¼ inch. This balance allows for a crispy exterior while keeping the inside soft enough to hold the toppings.
Keep in mind that cooking time will vary based on thickness and heat. A standard flatbread should take about 2-4 minutes per side on the grill, so monitor it closely to avoid burning.
Grilling the Flatbreads
Once your flatbreads are shaped, it’s time to move on to the grilling process.
Timing and Visual Cues for Perfect Grill Marks and Doneness
Preheat your grill to medium-high heat, around 400°F to 450°F. A properly heated grill is essential for achieving those coveted grill marks. Place the flatbread on the grill and watch for visual cues. After about 2 minutes, check for grill marks on the underside. If they look golden brown and well-defined, it’s time to flip.
Importance of Monitoring Heat and Grilling Time for Even Cooking
Keeping a close eye on the grilling process is vital. If the flames are too high, the flatbread may char before it cooks through. Conversely, if the heat is too low, it may become tough and chewy. Aim for even cooking by rotating the flatbreads halfway through the grilling time. This will ensure that all sides receive equal exposure to the heat, resulting in a perfectly grilled flatbread.
Layering and Topping the Flatbreads
With your flatbreads grilled to perfection, it’s time to layer on the delicious toppings.
Spreading the Pesto
The first step in creating a flavorful flatbread is spreading the pesto. Use the back of a spoon or a spatula to apply a generous layer of pesto across the surface, leaving a small border around the edges. This technique ensures even coverage and allows the flavors to penetrate the flatbread without overwhelming it.
Adding Tomatoes and Cheese
Next, it’s time to add the tomatoes and cheese. For the tomatoes, choose ripe, juicy varieties for the best flavor. Slice them thinly to ensure they cook evenly on the grill. Arrange them evenly over the pesto, distributing them to achieve a balanced flavor profile.
When it comes to cheese, fresh mozzarella is ideal for this recipe. Tear the mozzarella into bite-sized pieces and scatter it atop the tomatoes. This not only provides a luscious, gooey texture but also allows the cheese to melt beautifully. Keep in mind that mozzarella has a melting point of around 130°F. To achieve that perfect gooeyness, ensure the flatbread is placed back on the grill until the cheese is melted and bubbly.
Closing the Grill Lid
A crucial step in this process is closing the grill lid after adding the toppings. This traps the heat and helps melt the cheese while also allowing the flavors to meld together. Allow the flatbread to grill for an additional 3-5 minutes with the lid closed, checking periodically to avoid burning.
Serving Suggestions
Once your Grilled Tomato & Pesto Flatbread is ready, it’s time to plate it up and think about how to serve it.
Presentation Ideas for Serving the Flatbread
Slide the flatbread off the grill onto a cutting board. Use a sharp pizza cutter or knife to slice it into wedges for easy serving. For an appealing presentation, consider garnishing with fresh basil leaves or a drizzle of balsamic reduction. This not only enhances the visual appeal but also adds a tangy contrast that complements the flavors beautifully.
Pairing Options with Beverages or Side Dishes
This flatbread pairs exceptionally well with a variety of beverages. A crisp white wine, like Sauvignon Blanc, or a refreshing iced tea can complement its flavors nicely. If you prefer non-alcoholic options, a sparkling water with lemon or a light lemonade also works well.
For side dishes, consider serving a light arugula salad dressed with lemon vinaigrette. The peppery notes of arugula will balance the rich flavors of the flatbread, creating a harmonious meal.
Discussing Different Occasions Where This Flatbread Shines
The versatility of Grilled Tomato & Pesto Flatbread makes it a perfect dish for many occasions. Whether you’re hosting a casual gathering, enjoying a picnic, or serving as an appetizer at a dinner party, this flatbread is sure to impress. Its simplicity allows it to shine in both relaxed and formal settings, making it a crowd-pleaser every time.
Nutritional Benefits of the Ingredients
Understanding the nutritional benefits of your ingredients can enhance your appreciation for this dish.
Overview of the Health Benefits of the Main Ingredients
Tomatoes are an excellent source of vitamins C and K, potassium, and folate. They are also rich in antioxidants, particularly lycopene, which has been linked to numerous health benefits, including reduced risk of heart disease and cancer. Basil, the star of your pesto, is not only flavorful but also offers anti-inflammatory and antibacterial properties.
The whole-grain flatbread provides fiber and essential nutrients, making this dish a balanced option. The mozzarella cheese, while rich and creamy, also contributes calcium and protein, adding to the overall nutritional profile.
Discussing the Balance of Flavors and Nutrients in the Dish
This Grilled Tomato & Pesto Flatbread is not only a feast for the eyes but also a balanced dish that provides a variety of nutrients. The combination of fresh vegetables, herbs, and whole grains creates a flavorful experience that promotes health and well-being. You can feel good about indulging in this delicious recipe, knowing that it is packed with wholesome ingredients.
Conclusion
In summary, Grilled Tomato & Pesto Flatbread encapsulates the delightful essence of summer grilling. With its crispy exterior, gooey cheese, and vibrant flavors, it’s an ideal dish for sharing with family and friends.
Don’t hesitate to experiment with your toppings—try different cheeses, add olives, or even incorporate grilled vegetables for a twist. This flatbread is a canvas for your culinary creativity, and each variation can provide a new experience.
Celebrate the joy of cooking and the pleasure of sharing delicious meals with loved ones. Gather around the grill, prepare this delightful flatbread, and create lasting memories over a shared meal. Enjoy the process and savor every bite!