Introduction
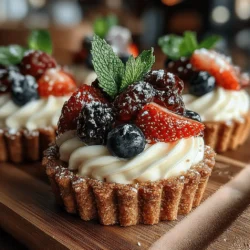
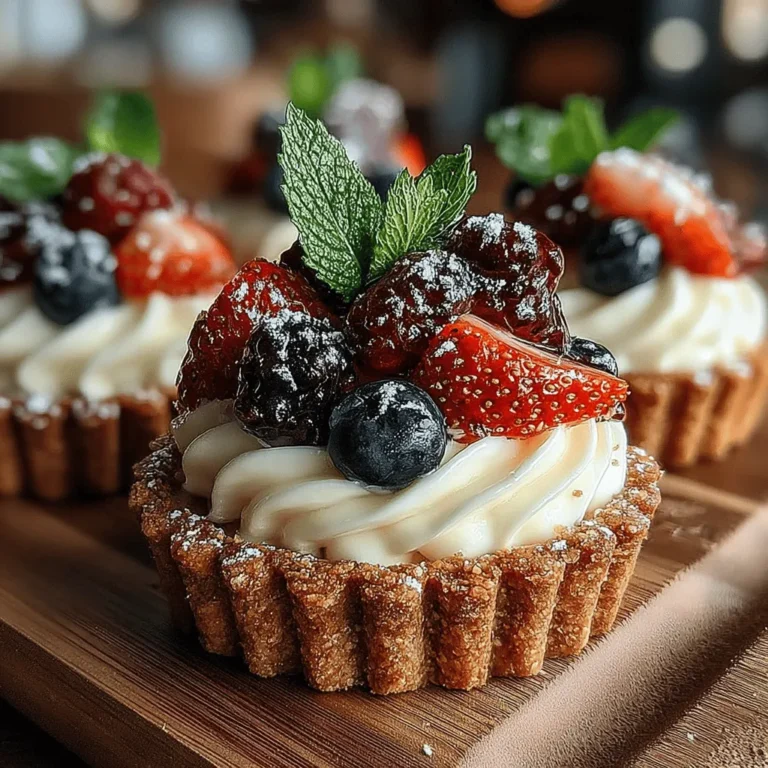
Indulging in a delicious dessert doesn’t have to be complicated, especially when it involves these delightful Mini Berry Ice Cream Tarts. This recipe is a celebration of fresh flavors, featuring a crunchy almond flour crust, a sweet and tangy berry filling, and creamy vanilla ice cream. Ideal for summer gatherings or as a refreshing treat on a warm day, these mini tarts are not only visually appealing but also easy to make. With their vibrant colors and harmonious blend of textures, they promise to impress your guests or simply satisfy your sweet tooth.
The concept of mini tarts has gained popularity in recent years, as they offer a delightful way to enjoy a variety of flavors in a single serving. These Mini Berry Ice Cream Tarts take that idea a step further by incorporating seasonal berries and a creamy ice cream layer. Whether you are hosting a summer barbecue, a birthday celebration, or simply looking to treat yourself, these tarts are versatile enough for any occasion.
In this article, we will explore the rich history of tarts, delve into the various ingredients that make this recipe unique, and guide you through the initial steps of preparation. You’ll learn how to create a nutty almond flour crust, prepare a luscious berry filling, and layer in the vanilla ice cream. Let’s dive into the details of this mouthwatering recipe, ensuring you have all the information you need to create these delightful desserts.
Understanding the Ingredients
To create the perfect Mini Berry Ice Cream Tarts, it’s essential to understand each ingredient’s role in the recipe. This insight not only enhances your culinary knowledge but also allows for customization based on your preferences and dietary needs.
The Tart Crust
The base of our mini tarts is a crunchy almond flour crust, which provides a gluten-free alternative to traditional pie crusts.
– Almond Flour: This ingredient is not only gluten-free but also adds a nutty flavor and delightful crunch to the crust. Almond flour is rich in healthy fats, protein, and fiber, making it a nutritious choice compared to regular flour. Its fine texture allows for a tender crust that holds together beautifully.
– Coconut Oil: As a healthier fat source, coconut oil keeps the crust moist and flaky. It has a subtle sweetness and a hint of tropical flavor that complements the other ingredients. When melted and combined with almond flour, it creates a cohesive dough that is easy to work with.
– Honey or Maple Syrup: These natural sweeteners enhance the flavor of the crust while providing a touch of sweetness. Both honey and maple syrup are versatile options; use whichever one suits your taste or dietary preferences. They also add moisture, helping the crust maintain its integrity when baked.
– Salt: This seemingly simple ingredient plays a crucial role in balancing the sweetness of the crust. A pinch of salt elevates the overall flavor profile, enhancing the nutty notes of the almond flour and the sweetness of the honey or maple syrup.
The Berry Filling
The heart of these mini tarts lies in the vibrant and refreshing berry filling.
– Mixed Berries: A combination of strawberries, blueberries, and raspberries is ideal for creating a colorful and flavorful filling. Each berry brings its unique taste and texture, resulting in a delightful medley. Strawberries offer sweetness, blueberries provide juiciness, and raspberries add a tangy kick.
– Sweetener: Adjusting the amount of honey or maple syrup allows for customization based on the sweetness of the berries. Fresh berries can vary in sweetness, so taste the mixture before adding more sweetener to ensure the perfect balance.
– Lemon Juice: A splash of lemon juice adds acidity that brightens the flavors of the berries. It enhances the overall taste and prevents the filling from becoming overly sweet. The citrus notes pair beautifully with the other ingredients, creating a refreshing contrast.
– Vanilla Extract: This aromatic ingredient provides depth and a warm flavor that complements the berries. Using pure vanilla extract is recommended for the best flavor, as it enhances the natural sweetness of the filling.
The Ice Cream Layer
To top off these delightful tarts, a creamy layer of vanilla ice cream is added.
– Vanilla Ice Cream: The rich and creamy base perfectly complements the tartness of the berries, creating a satisfying dessert experience. You can use store-bought ice cream or make your own if you prefer a homemade touch. For a dairy-free option, consider using coconut or almond milk-based ice cream.
Garnishing the Tarts
Presentation is key when it comes to desserts, and garnishing your tarts adds an appealing finishing touch.
– Extra Mixed Berries: Sprinkling additional mixed berries on top not only enhances the visual appeal but also adds a fresh burst of flavor. Choose ripe and vibrant berries for the best presentation.
– Fresh Mint Leaves: An optional garnish, fresh mint leaves add a pop of color and a refreshing aroma. They can elevate the overall aesthetic of your tarts, making them even more enticing.
Step-by-Step Instructions
Now that we’ve covered the ingredients, it’s time to roll up your sleeves and start preparing the Mini Berry Ice Cream Tarts. The first step in this delightful process is creating the tart crust.
Preparing the Tart Crust
1. Gather Your Ingredients: Start by measuring out your almond flour, coconut oil, honey or maple syrup, and salt. Having everything ready will streamline the process and make it easier to follow the recipe.
2. Preheat Your Oven: Preheat your oven to 350°F (175°C). This allows the oven to reach the desired temperature while you prepare the crust, ensuring even baking.
3. Mix Dry Ingredients: In a mixing bowl, combine the almond flour and salt. Stir them together thoroughly to ensure the salt is evenly distributed throughout the flour.
4. Add Wet Ingredients: Melt the coconut oil if it’s solid, and add it to the dry mixture along with the honey or maple syrup. Stir until the ingredients are well combined and form a dough. The mixture should be slightly sticky but manageable.
5. Press the Dough into Tart Tins: Divide the dough into equal portions, depending on the size of your tart tins. Press each portion into the bottom and sides of the tins, making sure the crust is even. You can use your fingers or the back of a spoon to achieve a smooth finish.
6. Bake the Crusts: Place the tart tins in the preheated oven and bake for 10-12 minutes, or until the edges are golden brown. Keep a close eye on them to avoid over-baking, as almond flour can brown quickly.
7. Cool the Crusts: Once baked, remove the crusts from the oven and allow them to cool completely in the tins. This step is crucial, as it ensures that the crust holds its shape when you add the filling and ice cream.
With the crusts prepared, you’re ready to move on to the next steps in creating your Mini Berry Ice Cream Tarts. Stay tuned for more details on preparing the berry filling and assembling the tarts in the following sections. Enjoy the process of crafting these delightful desserts that are sure to impress and satisfy!

Preheat the Oven
To get started on your Mini Berry Ice Cream Tarts, the first step is to preheat your oven to 350°F (175°C). This is crucial for ensuring that your tart crusts bake evenly and achieve a beautiful golden-brown color. An adequately preheated oven allows the almond flour and coconut oil to create a perfectly crispy texture, which will complement the creamy filling later on.
Mixing the Ingredients
Once your oven is preheated, it’s time to mix the ingredients for the tart dough. In a large mixing bowl, combine 2 cups of almond flour, 1/4 cup of melted coconut oil, 3 tablespoons of honey (or maple syrup for a vegan option), and a pinch of salt.
Using a wooden spoon or your hands, incorporate the ingredients until a dough forms. The mixture should be slightly crumbly yet hold together when pressed. If you find the dough too dry, add a teaspoon of cold water at a time until you achieve the right consistency. The goal is to create a cohesive dough that can be easily shaped into the tart crusts.
Pressing into Muffin Tin
Next, it’s time to shape the tart dough. Grease a standard muffin tin with a little coconut oil to prevent sticking. Take a small portion of the dough (about 1 tablespoon for each tart) and press it firmly into the bottom and up the sides of each muffin cup.
To ensure an even distribution, you can use your fingers or the back of a measuring spoon. Make sure the thickness of the dough is uniform to promote even baking. This method will create little bowls that are ready to hold your delicious berry filling and ice cream later on.
Baking
With the crusts pressed into the muffin tin, place them in the preheated oven and bake for about 10-12 minutes, or until they turn a light golden brown. Keep an eye on them, as baking times can vary depending on your oven.
When they are ready, remove the muffin tin from the oven and allow the crusts to cool in the pan for about 5 minutes. After that, gently remove the crusts by running a small knife around the edges and lifting them out carefully. It’s essential to let the crusts cool completely on a wire rack before proceeding to the next steps. This cooling process ensures that they maintain their shape and texture when filled.
Making the Berry Filling
Combining Ingredients
While the crusts are cooling, it’s time to prepare the berry filling. In a medium bowl, combine 1 cup of mixed berries—such as strawberries, blueberries, and raspberries—with 1-2 tablespoons of honey (or maple syrup), the juice of half a lemon, and 1 teaspoon of vanilla extract.
Stir the ingredients gently to coat the berries in the sweetener and citrus. This combination will not only enhance the flavor of the berries but also create a deliciously vibrant filling for your tarts.
Mashing Technique
To achieve the perfect texture, it’s time to mash the berries. Using a fork or a potato masher, gently crush the berries until they are slightly broken down but still have some whole pieces left. This will give your filling a delightful balance of chunkiness and juiciness while ensuring that it isn’t too watery. Aim for a consistency that allows the filling to hold together when spooned into the tart crusts.
Assembling the Tarts
Cooling the Crusts
Before you can fill the tarts, make sure that your crusts are completely cool. If they are even slightly warm, the ice cream will start to melt upon contact, which will affect the overall presentation and texture of your tarts.
Filling the Tarts
Once the crusts have cooled, it’s time to fill them. Start by scooping a spoonful of your berry filling into each tart crust. Be generous but leave a little room at the top for the ice cream.
After adding the berry filling, it’s time to layer your favorite vanilla ice cream on top. Using a small ice cream scoop or a spoon, add a rounded scoop of ice cream to each tart. This will create a beautiful layered effect and ensure that every bite contains both the berry filling and creamy ice cream.
Swirling Technique
For an attractive presentation, you can create a swirl effect. Using a skewer or the tip of a knife, gently swirl the berry filling and ice cream together. Be careful not to over-mix; the goal is to have visually appealing swirls that show off both the vibrant colors of the berries and the creamy texture of the ice cream.
Freezing the Tarts
Setting Time
Once your tarts are assembled, it’s crucial to put them in the freezer to set. Allow them to freeze for at least 2-3 hours, or until the ice cream is firm and the tarts are solid. Proper freezing ensures that the tarts hold their shape when served and provides the perfect refreshing texture.
Serving Temperature
When you’re ready to serve, remove the mini tarts from the freezer and let them sit at room temperature for about 5-10 minutes. This brief resting period allows the tarts to soften slightly, making them easier to eat while enhancing the flavors. If you serve them too cold, the flavors may be muted, and the texture could be too hard.
Nutritional Benefits
Healthier Dessert Options
When it comes to desserts, Mini Berry Ice Cream Tarts stand out as a healthier option compared to traditional sweets.
Almond Flour Benefits
Using almond flour instead of all-purpose flour brings a wealth of nutritional advantages. Almond flour is lower in carbohydrates and higher in healthy fats, protein, and fiber, making it a great choice for those following low-carb or gluten-free diets. It also contains vitamin E, magnesium, and antioxidants, contributing to better overall health.
Natural Sweeteners
In this recipe, we use honey or maple syrup as natural sweeteners. Both options have a lower glycemic index than refined sugars, meaning they have less impact on blood sugar levels. Natural sweeteners also contain beneficial nutrients and antioxidants, making them a more wholesome choice for satisfying your sweet tooth.
Berry Goodness
The mixed berries used in this recipe are not only delicious but also packed with health benefits. They are rich in antioxidants, vitamins, and minerals, which are vital for maintaining good health. Berries, particularly blueberries and strawberries, are known for their anti-inflammatory properties and have been linked to improved heart health, better brain function, and a lower risk of chronic diseases.
Conclusion
In conclusion, Mini Berry Ice Cream Tarts offer a perfect blend of flavors and textures, making them an excellent choice for any dessert lover. With a simple preparation process and nutritious ingredients, these tarts are not only a treat for the taste buds but also a healthier dessert option.
Whether you are hosting a summer barbecue or simply craving a sweet indulgence, these mini tarts are sure to impress. Embrace the joy of creating this refreshing dessert, and enjoy every delightful bite. The combination of the crunchy almond flour crust, the sweet and tangy berry filling, and the creamy vanilla ice cream ensures that these tarts will become a favorite in your dessert repertoire. So gather your ingredients, follow the steps, and indulge in these delightful Mini Berry Ice Cream Tarts!